Actions On Visibility
Load non-critical requests, components, images and, more when they are visible in the viewport
So a couple of months ago I come across Intersection Observer API which helped me a lot in lazy loading multiple BE requests on different pages on my work at @Instabug which affected the first-time load of these pages significantly. After that, I thought that sharing this use case with a simple overview of the intersection observer would be helpful for others.
Basically, Intersection Observer helps in observing changes in the intersection of a target element with an ancestor element or with a top-level document's viewport.
In this article, We will discuss a quick overview of Intersection Observer API and iterate over a few functional uses for it like lazy-loading Requests, Components, Images, and more.
[1] Introduction
Besides having components that only load based on user interaction, We often have components, images that aren't visible on the initial page.
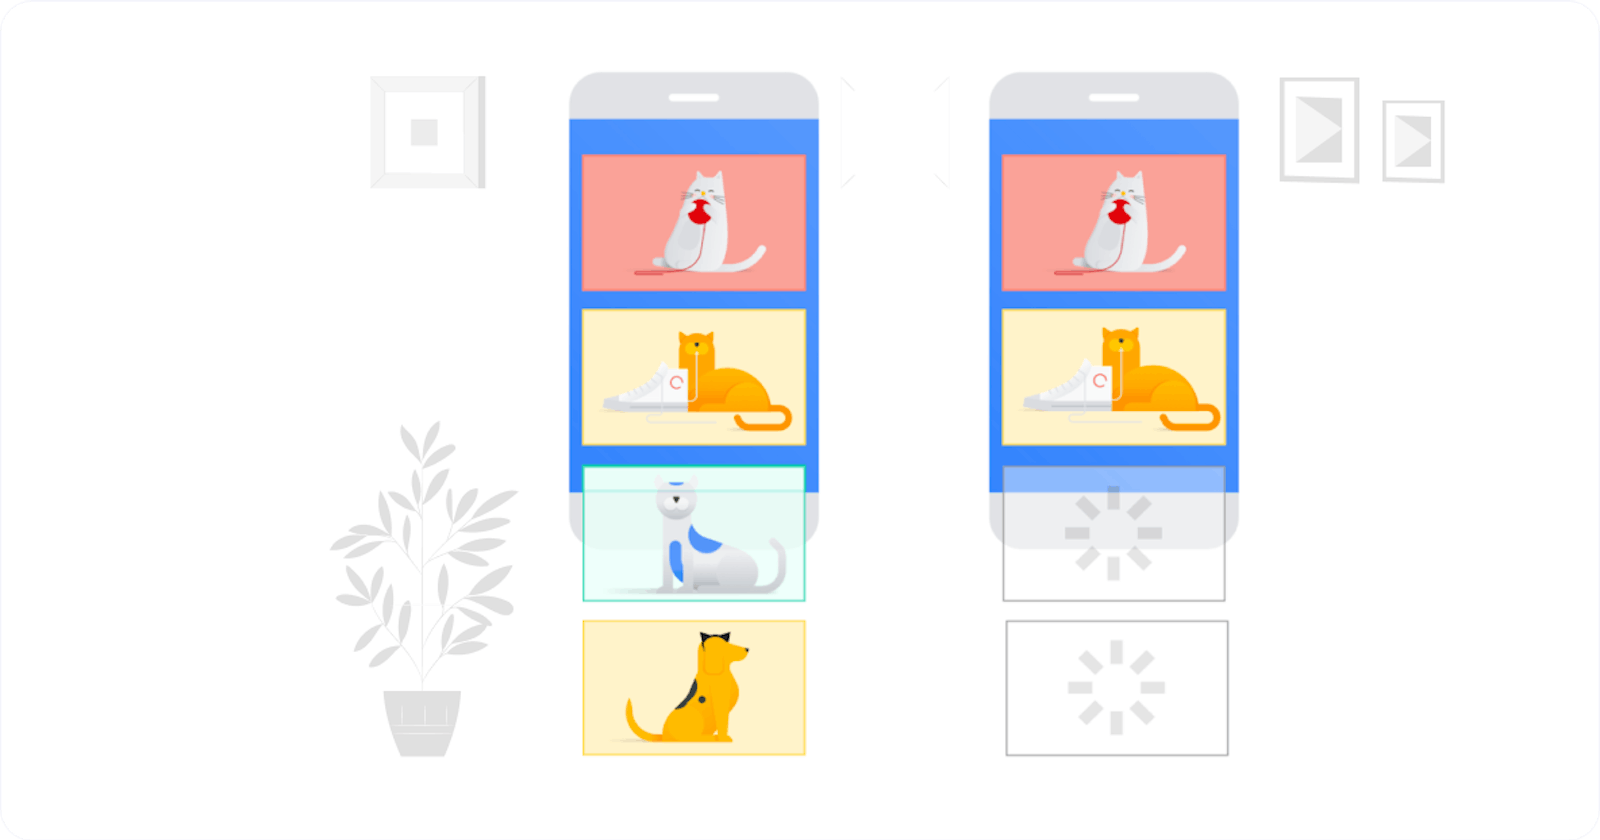
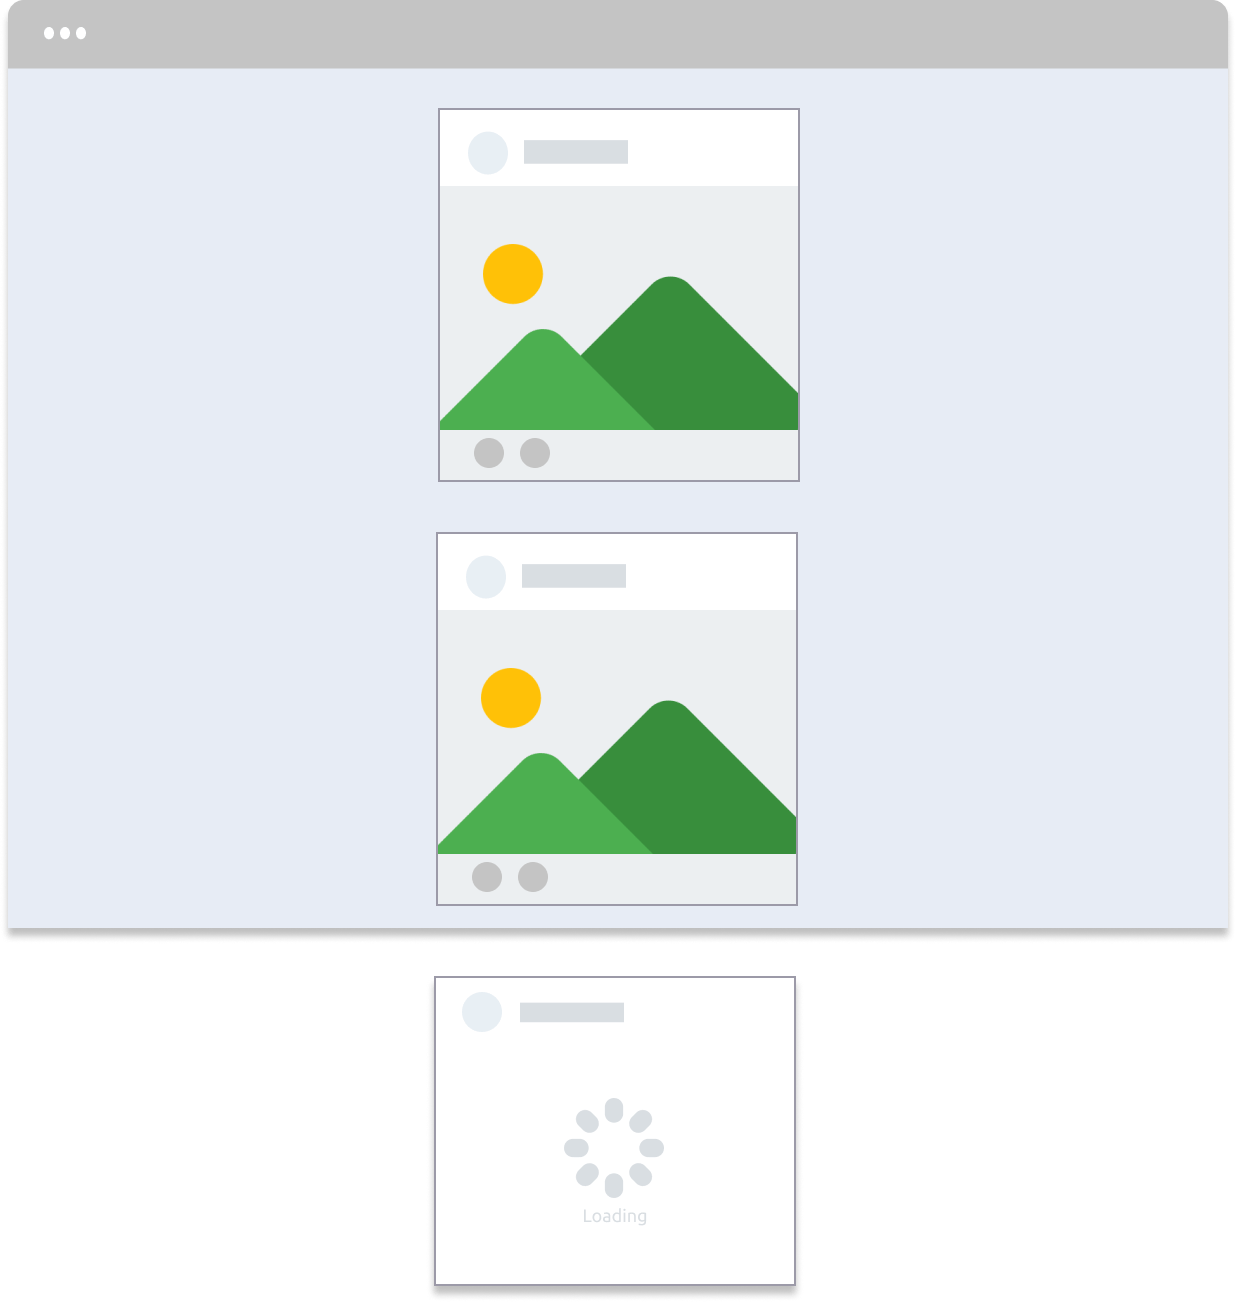
A good example of this is lazy loading images that aren't directly visible in the viewport, but only get loaded once the user scrolls down as shown in the below figure.
Since we are not requesting all images instantly, This will reduce the initial loading time for our page. We can do the same with requests, components, and more!
[2] An Overview of IntersectionObserver
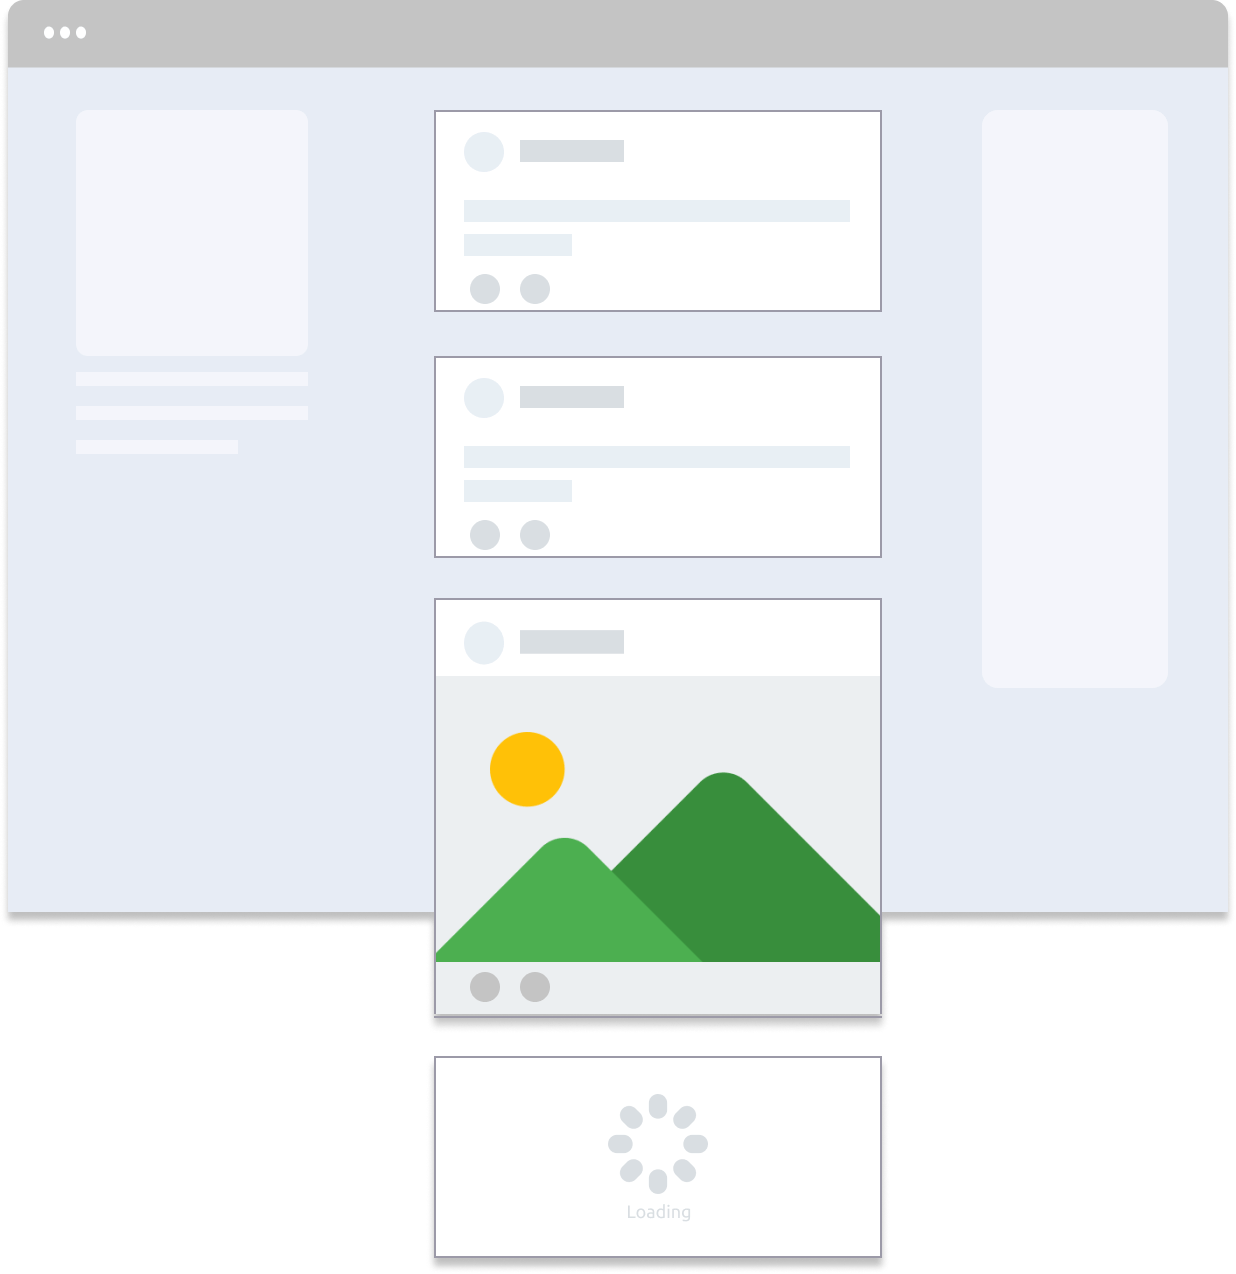
The Intersection Observer API is simply a way to monitor and observe the position and the visibility of an element in the DOM and to have a hook (callback) function that will run when the element intersects.
The powerful point of Intersection Observer API is that it's Framework agnostic which means that you can use it with any framework or any library.
If you want to check whether Intersection Observer is supported in your browser or not, You can use the in Operator which is widely used to detect features supported by the browser. JavaScript features are globally available as a property to the window objects. So we can check if the window element has the property.
if ('IntersectionObserver' in window){
    // call the IntersectionObserver handler
} else {
    // call the initial method for sending the request
}
Now, Let's take a look at the Intersection Observer API and see how to use it
const observer = new IntersectionObserver(callback, options);
The IntersectionObserver object's constructor takes two parameters:
Callback function, a function that's executed once the observer notices an intersection
Options object (Optional), an object that controls the circumstances under which the observer's callback is invoked
[1] Options Object
The Options object consist of 3 fields as follows:
- root: The element that is used as the viewport for checking the visibility of the target. Must be the ancestor of the target. Defaults to the browser viewport if not specified or if null.
- rootMargin: Margin around the root. Can have values similar to the CSS margin property, e.g. "10px 20px 30px 40px" (top, right, bottom, left).
- threshold: The percentage of the observed target that should come into view before it can be considered an intersection.
e.g. If the value of the threshold is 0.5 this means that once 50% of the target element is observed, the element will be considered intersected and the callback function will be triggered.
Also, the threshold can accept an array instead of a single value. If the value is [0.3, 0.6], then the callback is triggered when the element is in or passes its 30% visible threshold and also, its 60% visible threshold.
const options = {
  root: null,
  threshold: 0,
  rootMargin: "-100px",
}

const callback = (entries, observer) => {}

const observer = new IntersectionObserver(callback, options);
[2] Observe & Unobserve
Intersection Observer provides two methods to help us register and unregister elements to the API. For each element we register (observe), Intersection Observer provides a list of useful properties which is as follows:
target: This is the actual element that is being observed by the observer for an intersection with the root element.
isIntersecting: This returns a Boolean value of true if the target element being observed is currently intersecting or not.
isVisible: This returns a Boolean value of true or false which indicates whether or not the target element being observed is currently visible in the browser's viewport.
etc.
[3] Lazy Loading Images
That’s enough of the theory now. Let’s see some demos. First up, lazy loading.
[1] HTML
As a first step, I will just add multiple images with a wrapper div with class block and data-src attribute instead of the regular src attribute as follows:
<div class="block">
  <img data-src="https://placeimg.com/350/350/mountain">
</div>

<div class="block">
  <img data-src="https://placeimg.com/350/350/nature">
</div>

..
..
..
[2] CSS
I will add some basic styles to align the image in the center of the page with a height equal to 100vh and a simple fading as follows:
.block {
  height: 100vh;
  width: 100%;
  display: flex;
  justify-content: center;
  align-items: center;
}

.fade-in {
  animation-name: fadeIn;
  animation-duration: 1.3s;
  animation-timing-function: cubic-bezier(0, 0, 0.4, 1);
  animation-fill-mode: forwards;
}

@keyframes fadeIn {
  from {
    opacity: 0;
  }

  to {
    opacity: 1;
  }
}
[3] JS
In order to use the Intersection Observer to lazy load our images, We need to start by creating a new instance using the default Object Constructor after that we need to tell the observer what target element to observe using its built-in observe() method on the observer.
const observer = new IntersectionObserver(handler, observationOptions);
observer.observe(targetElement)
As a first step, we need to select our target elements (the images on the page).
const images = document.querySelectorAll('img[data-src]');
After that, we have to check whether the Intersection Observer is supported in the browser using the in Operator we mentioned above.
if ('IntersectionObserver' in window) {
  // Supported
} else {
  // Not Supported
}
In case the IntersectionObserver is supported, now we can create our instance and iterate over our images and start observing them using the built-in observe method.
  const options = {
    root: null,
    rootMargin: '50px 0px',
    threshold: 0.01
  };

  const observer = new IntersectionObserver(handler, options);
  images.forEach(img  => observer.observe(img));
Otherwise, We will load all the images in the initial load of the page
  console.log('Intersection Observers not supported');
  images.forEach(image => loadImage(image));
For our handler, It receives 2 parameters, the first one is the entries that we observe and the second one is the observer itself
const handler = (entries, observer) => { }
For each of our entries, we need to check whether the current element is intersected with our root (view-port) or not. If so, this means that it's a suitable time to load our image by assigning the image path to the src attribute.
const handler = (entries, observer) => {
  entries.forEach((entry) => {
    if (entry.isIntersecting) {
      loadImage(entry.target);
      observer.unobserve(entry.target);
    }
  });
}
[4] Final Code
let observer;
const images = document.querySelectorAll('img[data-src]');

const options = {
  root: null,
  rootMargin: '50px 0px',
  threshold: 0.01
};

const loadImage = (image) => {
  image.classList.add('fade-in');
  image.src = image.dataset.src;
}

const handler = (entries, observer) => {
  entries.forEach((entry) => {
    if (entry.isIntersecting) {
      loadImage(entry.target);
      observer.unobserve(entry.target);
    }
  });
}

if ('IntersectionObserver' in window) {
  const observer = new IntersectionObserver(handler, options);
  images.forEach(img  => observer.observe(img));
} else {
  console.log('Intersection Observers not supported');
  images.forEach(image => loadImage(image));
}
[4] CodePen Demo
[4] Lazy Loading BE Requests
Lazy Loading Requests is another usage of the intersection observer which follows the same set of steps we mentioned about and the only difference is in the handler callback function which will depend on the application we use the intersection observer for.
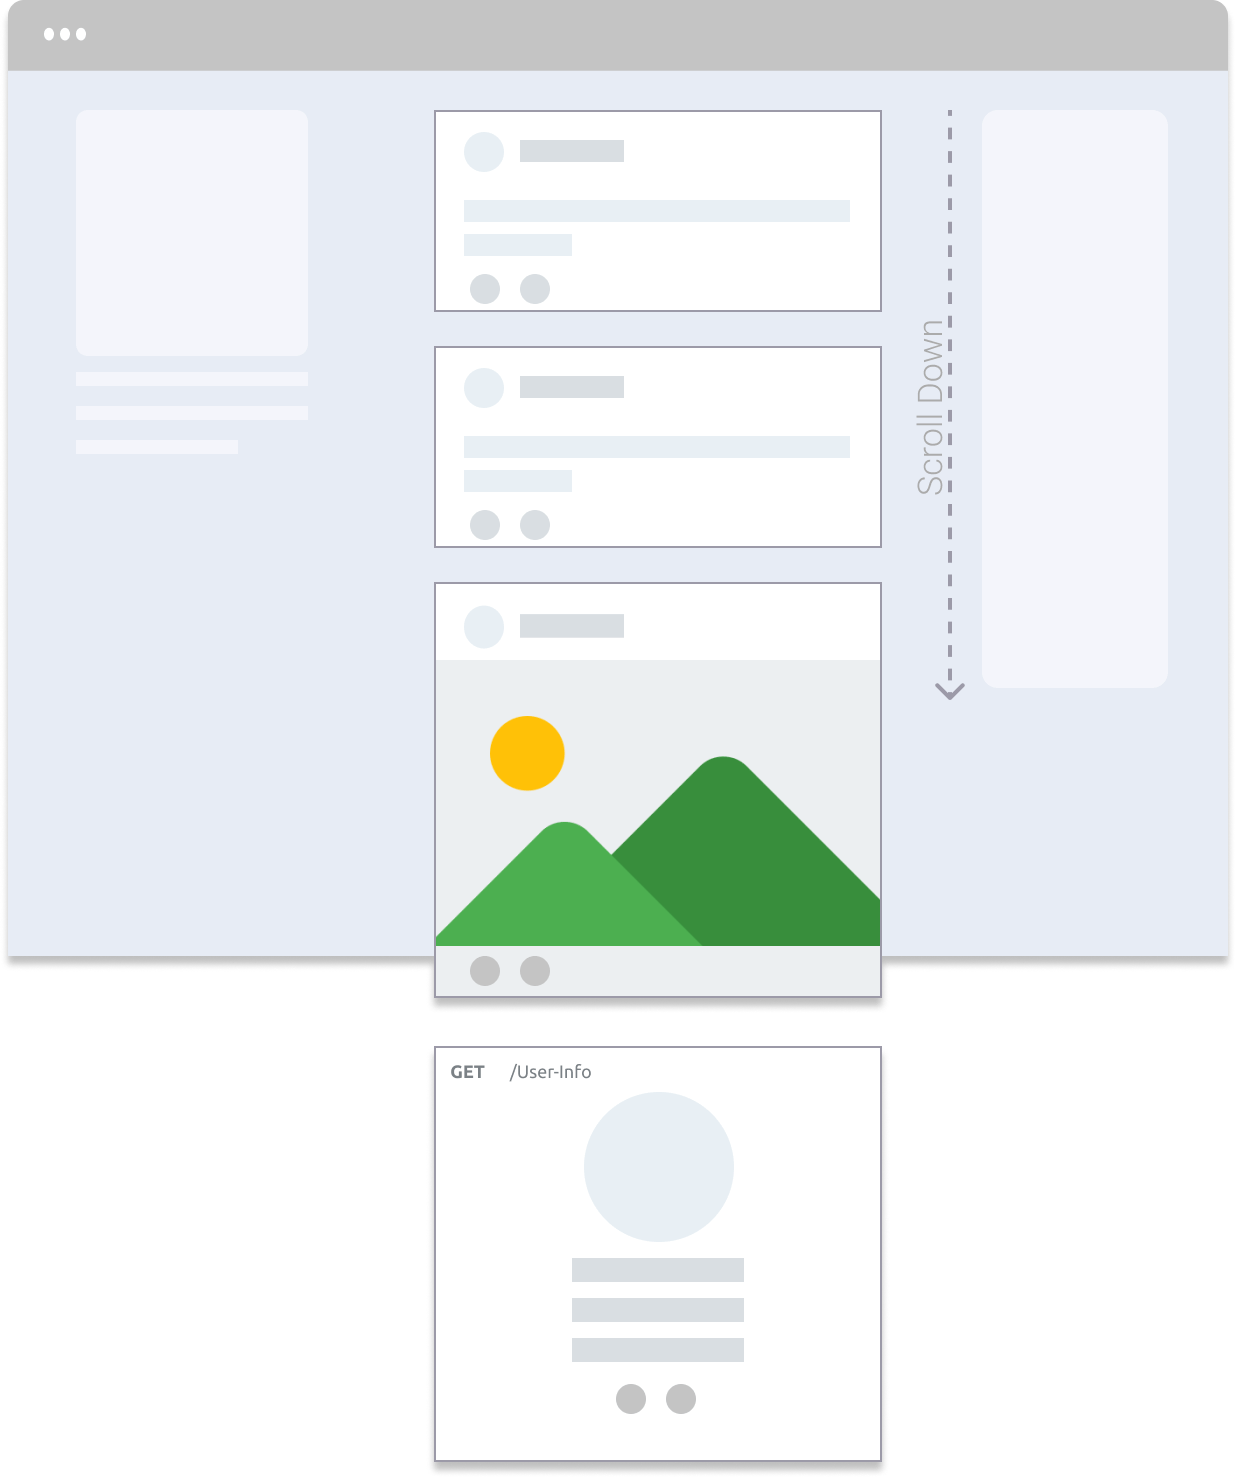
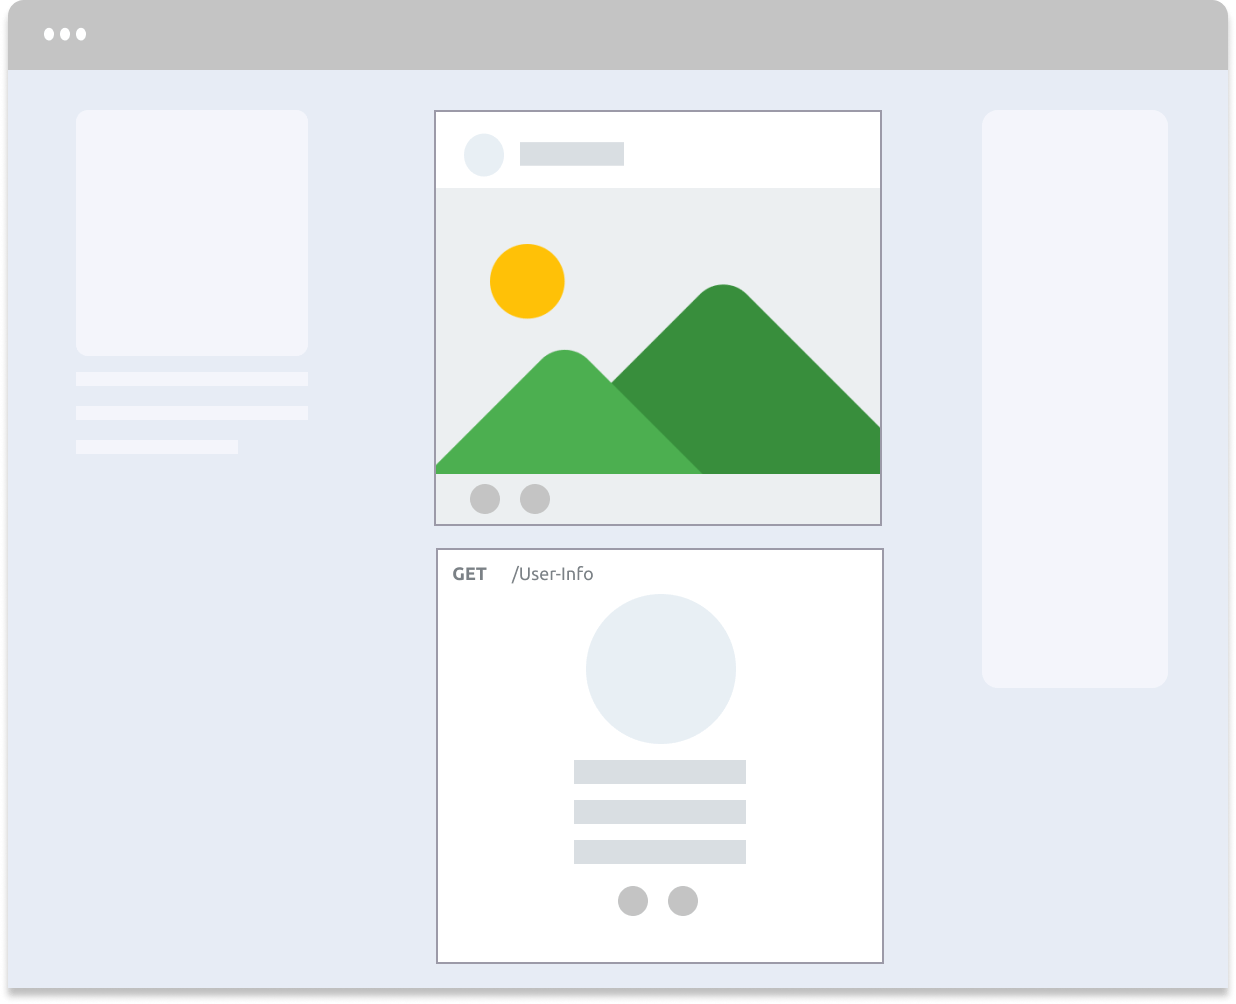
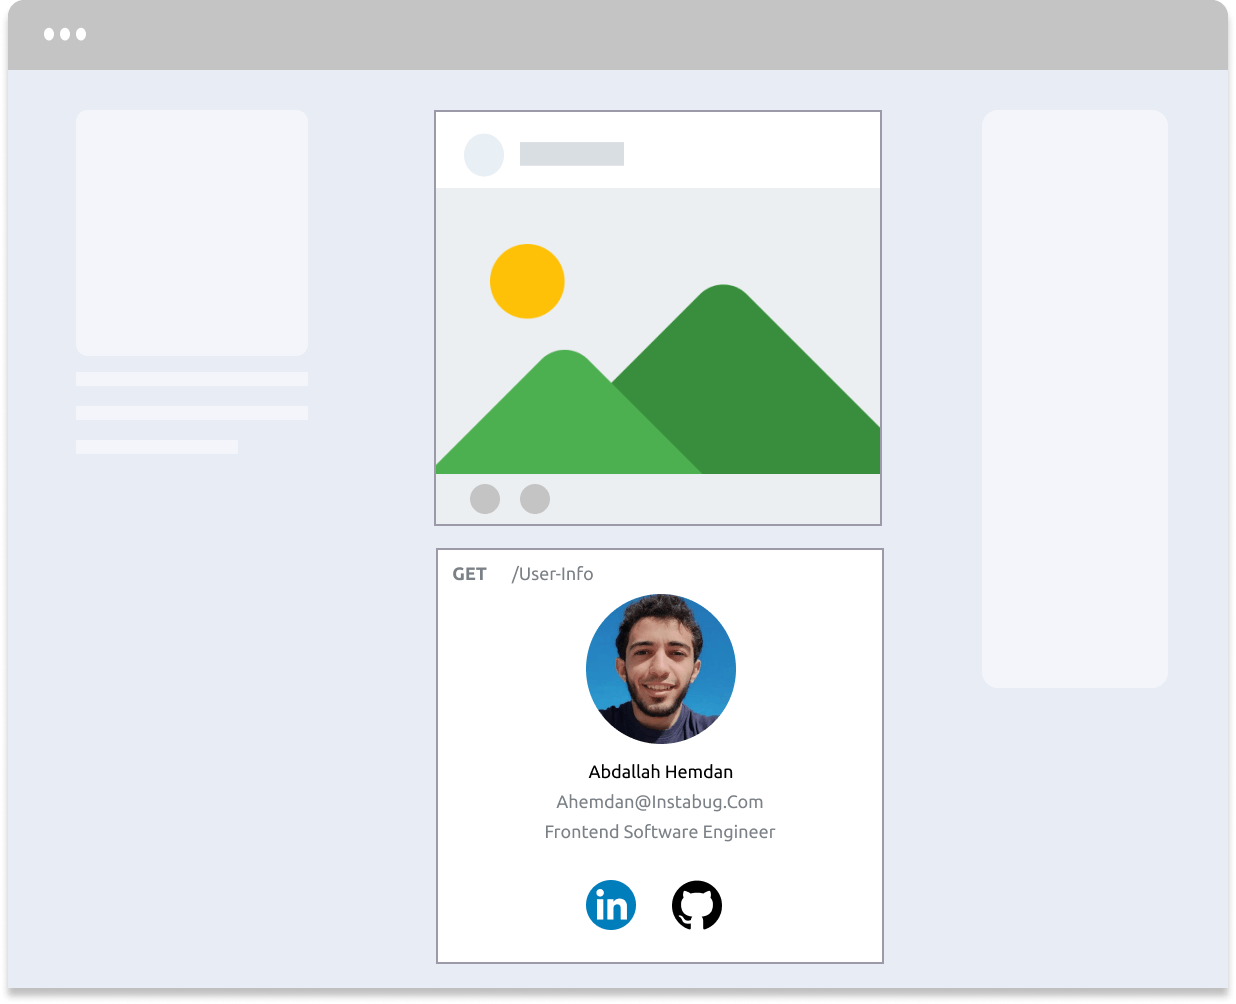
Imagine we have a component that requests data from BE endpoint to get the user profile information as follows:
{
  username: 'Abdallah Hemdan',
  email: 'ahemdan@instabug.com',
  title: 'Frontend Software Engineer',
  github: 'https://github.com/AbdallahHemdan',
  linkedIn: 'https://www.linkedin.com/in/abdallah-a-hemdan/',
}
Since the component will only be visible after scrolling down, so sending this request on the initial load of the page can affect the first-time load of your page which will affect your website conversion rates and the user experience. on the other hand, you can only send the request when the profile component becomes visible (Intersected with the viewport)
[1] HTML
Let's assume that our user information card is wrapped with a class of user__information as follows:
<div class="user__information">
...
</div>
[2] JS
The class of the user__information will be our target element which we will observe as follows:
const userProfilerWrapper = document.querySelector('user__information');
const options = {
  root: null,
  threshold: 0,
  rootMargin: '-50px',
};

const logsObserver = new IntersectionObserver((entries, observer) => {
  entries.forEach((entry) => {
    if (entry.isIntersecting) {
      _getUserData();
      observer.unobserve(entry.target);
    }
  });
}, options);

logsObserver.observe(userProfilerWrapper);
Currently, the _getUserData() function will not load on the initial load of the page but will only be called when the component user information gets into the view and intersects with the viewport which will enhance our first time load.
[5] IntersectionObserver Support
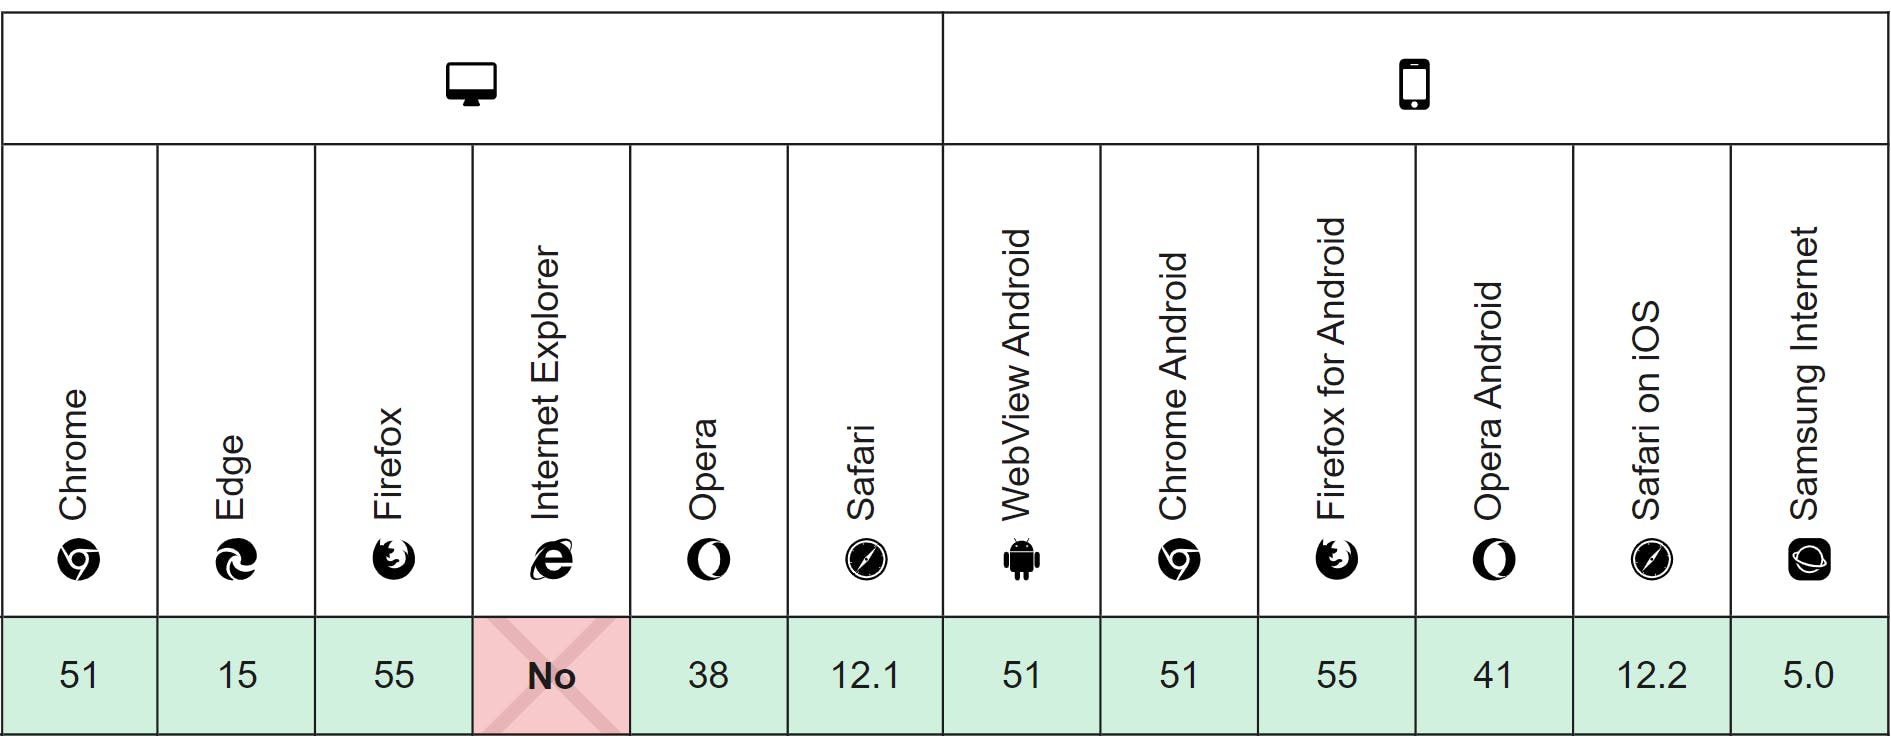
The Intersection Observer API has gained large support in the browsers at that time but unfortunately, it's not fully supported in all the browsers-versions so you may need to include a polyfill to make it work on incompatible browsers or fallback to the load the component, image, or the request on the initial load of the page
You can use caniuse.com to check the support of any API
[6] Conclusion
Thanks for observing along! 👀👏
The main point of the post was to explain the idea of how to use the Intersection Observer API, to be able to observe elements and trigger events based on where they intersect the viewport.
As we saw, each intersection entry has a set of properties conveying information about the intersection. I didn’t cover all of them in this post, so be sure to review them from here.
